Activation
- From the WP admin panel, click “Plugins” -> “Add new”.
- In the browser input box, type “Add Stripe Payments for Contact Form 7”.
- Select the “Add Stripe Payments for Contact Form 7” plugin and click “Install”.
- Activate the plugin.
OR…
- Download the plugin from this page.
- Save the .zip file to a location on your computer.
- Open the WP admin panel, and click “Plugins” -> “Add new”.
- Click “Upload”.. then browse to the .zip file downloaded from this page.
- Click “Install”.. and then “Activate plugin”.
OR…
- Download the plugin from this page.
- Extract the .zip file to a location on your computer.
- Use either FTP or your hosts cPanel to gain access to your website file directories.
- Browse to the wp-content/plugins directory.
- Upload the extracted add-stripe-payments-for-contact-form-7 folder to this directory location.
- Open the WP admin panel.. click the “Plugins” page.. and click “Activate” under the newly added “Add Stripe Payments for Contact Form 7” plugin.

Let’s Start…
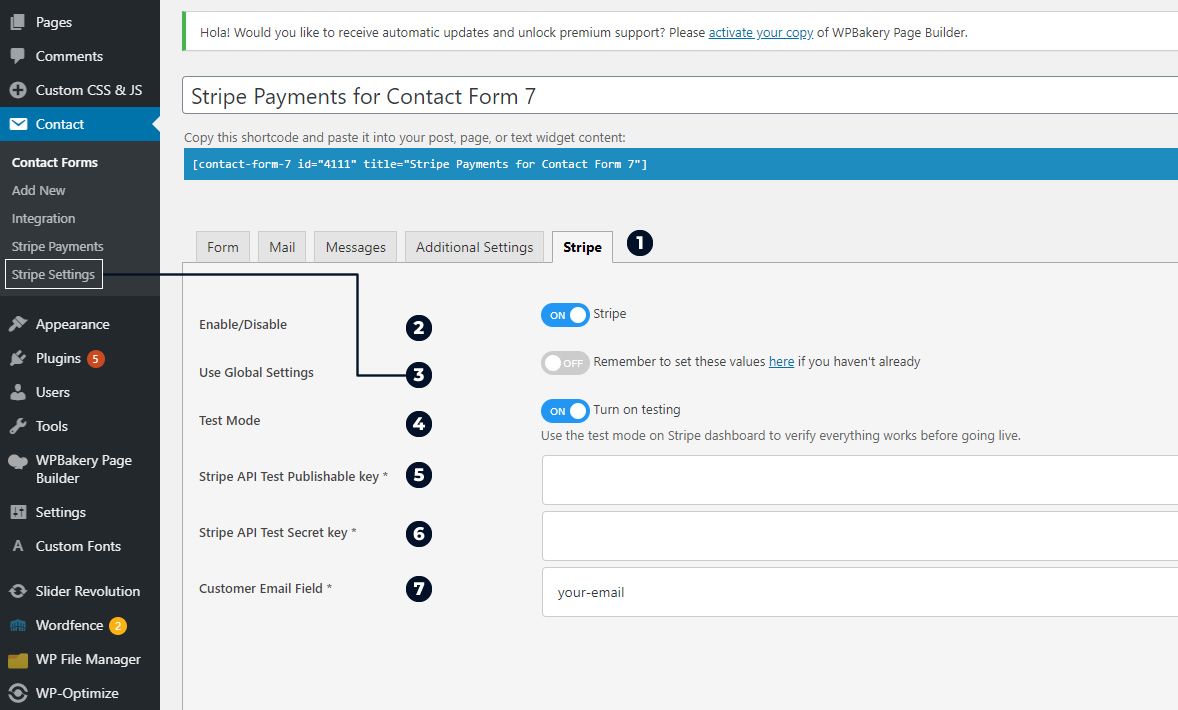
- Click the tab Stripe on the menu (lats tab on top).
- Check Enable to start customizing your form.
- To setup Global Settings (available for paid subscriptions only):
- Go to the Contact menu (right side), and click Stripe Settings.
- On the Welcome tab, register you product
- On the Options tab, you can set your Stripe API Keys and enable Test mode.
- Enable Test Mode to verify everything works before going live.
- Enter your Stripe API Test Publishable key (required). Get it from Stripe then Developers > API Keys page in your Stripe account.
- Enter your Stripe API Test Secret key (required). Get it from Stripe then Developers > API Keys page in your Stripe account.
- Place the Customer Email with the same name attribute of the email field assigned on your Contact Form 7 (no brackets).

About your product…
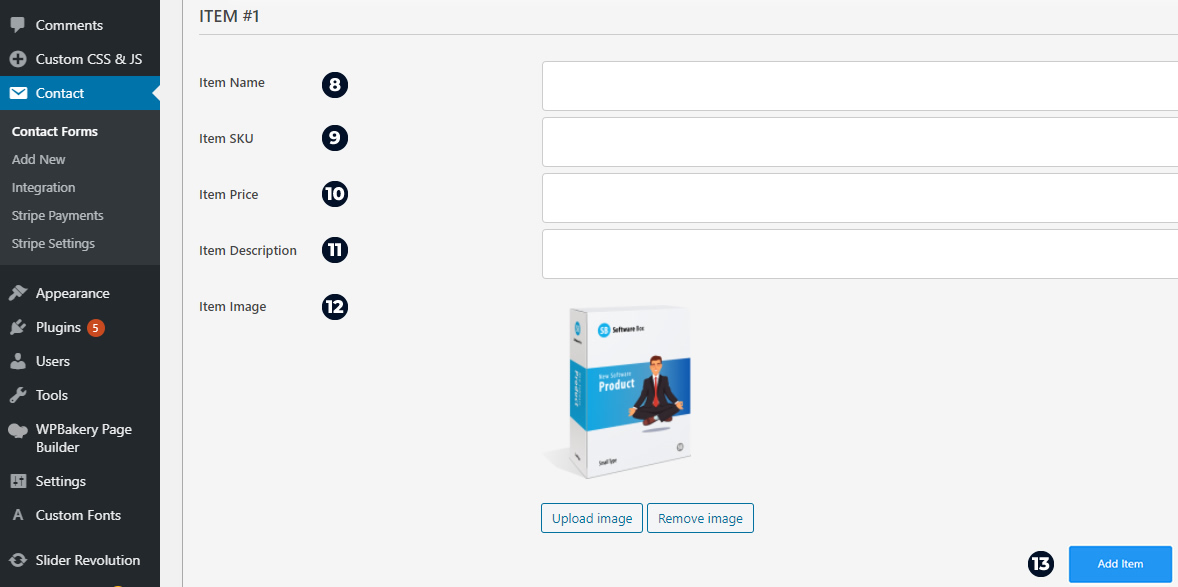
- Item name (required): Product name.
- Item SKU (required): Product bar code number.
- Item Price (required): Product price
- Item Description (required): Description of the product.
- Item Image (optional): Upload your product image
- Add Item (available for Pro version only): Add as many products as you wish.


Additional Settings
(Available only for Pro version)
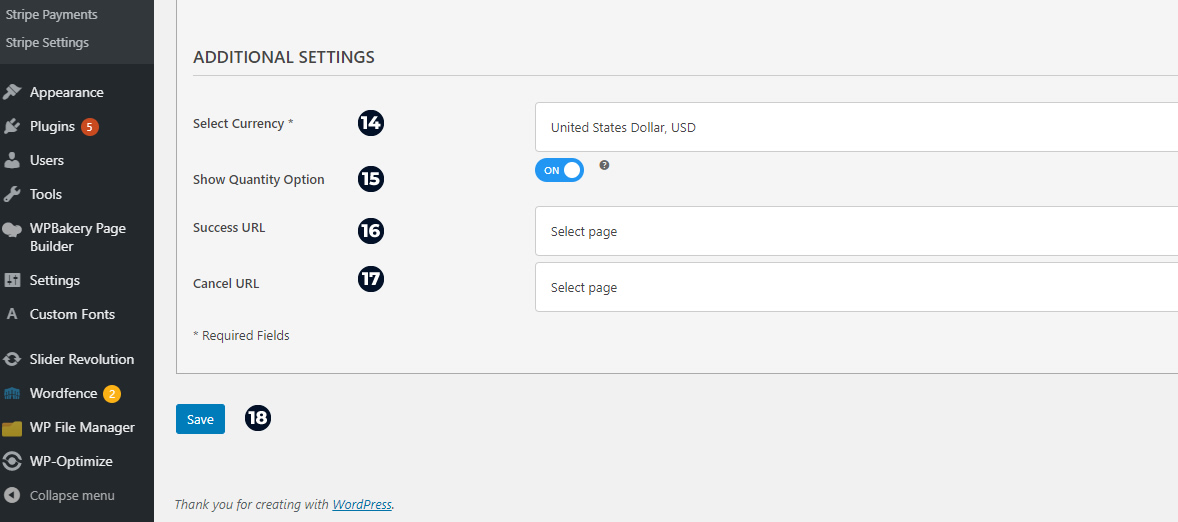
- Select Currency (required): Select your currency of Stripe here. 24 currencies are supported in this plugin.
- Quantity Option (optional): Enable this option to sell more than 1 unit. Option will be available to use after product is added to the cart, on the Order Summary area
- Success URL (optional): Enter the URL of the page to redirect for a Successful Stripe Payment transaction.
- Cancel URL (optional): Enter the URL of the page to redirect if a transaction fails.
- Save your information.
